Hi,
I've just realised its been an absolute age since I posted up any project work! Man the months have flown by so fast!
I think the lack of posts has been down to me not making much in the last few months and shifting over to playing on my Supergun and my consoles rather than doing modifications etc. Actually playing on the consoles and games I have rather than just working on them. It's been good fun and I'm slowly ticking my way through my games on my shelves.
Me and my girlfriend (now fiancee) have also been away on holiday to New Orleans for just over a week last month which was amazing! It was a real adventure to go all that way and we had an awesome time. The weather was great, we saw lots of jazz and other types of music played out in the open, did a little dancing but not as much as we were hoping and expecting. That was very weird, we expected big dancing clubs etc being the heartland of jazz and jazz being the main music Lindy hop is danced too but everywhere was very small and really really crowded. So we didn't get much Lindy done.
The main thing that happened on the holiday was I proposed to my girlfriend on the nightly jazz cruise up the Mississippi river on the steam paddle boat Natchez. It was a perfect night for it, nice and warm, we'd been sitting listening to some amazing jazz being played by the Dukes of Dixieland. And when we went for a walk around the boat we stopped to watch the paddle propel us up the river with New Orleans lit up and reflecting in the water and I clumsily dropped the question. It was better than I hoped!
Since coming home from holiday I've been doing lots of little projects for other people art and design wise which has been a really nice change. I've been asked to draw a tattoo based on elements that make up her brothers personality who sadly passed a month ago. Its been a nice challenge and a little worrying to do as its a very personal thing. Instead of cartoony doodling style it's been all very still life style which is something I've not done since school so it was good fun to revisit that style of drawing. And I was pleased to see that I could still do that kind of artwork.
The main project I've been working on in my spare time between designing etc is working in collaboration with one of my best mates and one of his industry friends on a shootem up game. And its been super exciting and very different to how I've normally worked as in the past I've done all the art, figured out clumsily the coding or logic using something like Construct 2 etc etc and have only ever gotten so far. With this we have really been making strides in different areas of the games ideas and with 3 of us working on it its branching out along the different developmental lines really nicely.
I can't post anything about what we've been doing yet but at some point we will have a tumblr / website for the game development and I'll cross post over to here to keep my blog updated. It's all very exciting and again its getting me drawing and developing new skills and styles.
So basically, that's whats been happening. Game playing, holidaying, planning, designing, drawing and exciting developments.
Catch you later
Porl''

Tuesday, 26 November 2013
Monday, 1 July 2013
STREET FIGHTER 2 CHAMPION EDITION BOOTLEG *FIXED*
Hi everyone,
In my last post I was starting work on my Street Fighter 2 Champion Edition bootleg repair. I was tentatively dipping my toe into the world of arcade game repair. Well I started doing a lot of tracing tracks from the suspiciously warm chips in the middle of the board and reading up on the internet what the chips actually are.
I found that the really warm LS245's were tracing into or coming out of a bank of 6116 SRams. Thankfully I had a couple of 6116's in my stock of chips and stuff in my shed so I set about 'shotgunning' the board.
I ordered some socket strips from ebay which were really cool! I wanted to socket all the chips I was replacing because you can swap out the chips if they dont work right. All you have to do is pop the dodgy chip out with a screwdriver rather than having to cut the chip out each time and then desoldering the legs. Its not a really long process cutting them out but you don't really want to be doing it each time.
Well I traced across from one of the LS245's that seemed to have its top row of pins stuck low and it ran to one of the 6116's. I snipped him out and fitted a socket and switched it on to see what happened. Well all the foreground graphics dissappeared and all you could see was the backgrounds. Pretty cool!! I popped a replacement 6116 in and the foreground graphics came back with a slight bit of glitching gone. Stoked! It was really interesting to see what would happen without one of the chips in there.
I traced across from the other LS245 which had some pins stuck High and replaced the 6116 and the bouncing stage issue stopped!! Hot damn!!! :D It was such a cool feeling when I noticed the high score screen didn't bounce. I plugged the arcade stick and kick-harness in and played through the whole game and all bouncing stages were fixed!
The only thing left really was the KO kept glitching and moving and some of the maps on the player select were glitching so I had 4x 6116's left so I just replaced all the 6116's in the bank that were around the 2 issue ones.
And now I have this :
A pretty much glitch free SF2 : CE bootleg board! :D That I fixed myself! Something I didn't really think I could do at all. Soldering and wiring for Supergun's, arcade sticks and console mods/repairs aren't too worrying for me but attacking something full of chips was something else.
Stoked out is an understatement!! :D
Catch you later
Porl''
In my last post I was starting work on my Street Fighter 2 Champion Edition bootleg repair. I was tentatively dipping my toe into the world of arcade game repair. Well I started doing a lot of tracing tracks from the suspiciously warm chips in the middle of the board and reading up on the internet what the chips actually are.
I found that the really warm LS245's were tracing into or coming out of a bank of 6116 SRams. Thankfully I had a couple of 6116's in my stock of chips and stuff in my shed so I set about 'shotgunning' the board.
I ordered some socket strips from ebay which were really cool! I wanted to socket all the chips I was replacing because you can swap out the chips if they dont work right. All you have to do is pop the dodgy chip out with a screwdriver rather than having to cut the chip out each time and then desoldering the legs. Its not a really long process cutting them out but you don't really want to be doing it each time.
Well I traced across from one of the LS245's that seemed to have its top row of pins stuck low and it ran to one of the 6116's. I snipped him out and fitted a socket and switched it on to see what happened. Well all the foreground graphics dissappeared and all you could see was the backgrounds. Pretty cool!! I popped a replacement 6116 in and the foreground graphics came back with a slight bit of glitching gone. Stoked! It was really interesting to see what would happen without one of the chips in there.
I traced across from the other LS245 which had some pins stuck High and replaced the 6116 and the bouncing stage issue stopped!! Hot damn!!! :D It was such a cool feeling when I noticed the high score screen didn't bounce. I plugged the arcade stick and kick-harness in and played through the whole game and all bouncing stages were fixed!
The only thing left really was the KO kept glitching and moving and some of the maps on the player select were glitching so I had 4x 6116's left so I just replaced all the 6116's in the bank that were around the 2 issue ones.
And now I have this :
A pretty much glitch free SF2 : CE bootleg board! :D That I fixed myself! Something I didn't really think I could do at all. Soldering and wiring for Supergun's, arcade sticks and console mods/repairs aren't too worrying for me but attacking something full of chips was something else.
Stoked out is an understatement!! :D
Catch you later
Porl''
Tuesday, 11 June 2013
STREET FIGHTER 2 CHAMPION EDITION BOOTLEG
Hi everyone,
Sorry there's been a bit of a delay between posts on here. I've been meaning to make a post on the new Jamma Supergun I made last month but I've gotten caught up playing it haha, going to Revival and since then trying to get the nerve up to start trying to repair the Street Fighter 2 Champion Edition bootleg I got from there.
Basically I've had crap luck with bootleg boards so far and I now see why peeps in the forum I frequent steer clear of them really. The two I've had now have had weird problems where all the proper original games I have had no problems at all. Oh well.
I was really excited to get this game back from Revival and then during the next week spend an evening playing it to death with my mate Glynn. See if I could win a few matches against his 4/5 hit dragon punch combo's :-P
Well I get home and had about half an hour to check it before going out again. So I ran upstairs and excitedly hooked my Supergun up and fired the sucker up. Well, it runs but man is it dissappointing! The graphics are all glitched out!! Ryu's sprite is flickering around constantly on the screen and the KO sign keeps moving about. It run's but it looks poop!
I decided to make a video of it the next day and put it on Youtube and the forum I go on to see if anyone on there could point me in the right direction to diagnose the problem.
Here's the vid of the board in action.
Two comments I got on the video were to check the voltage on my internal power supply. I had the +5v set to run my CPS2 boards which is a little higher than normal, I think +5.2v. So I got my mini screwdriver out and started to slowly crank the +5v to see what happens.
Well when you get the voltage nearly up to +6v the sprite glitchiness starts to go, well Ryu's sprite goes anyway. That's good to know that it will get rid of the sprite glitch kind of but I really shouldn't have to crank the voltage up to that high. And it still hasn't fixed the problem really.
The next problem I noticed was on certain stages the screen seems to bounce about, like its losing sync. Its not rolling, just moving about up and down and slightly left and right. But if you go all the way over to the left on some of the 'bouncing' levels it stops moving and plays as it should. Very weird!!
I've started trying to play through the game and through the bouncing to see which stages are fine, some are, and which bounce. Its got me wondering if its one of the Mask Roms which holds the game information is slightly 'bad' or something. Maybe one of the Mask Roms holds 7 stages and another Rom holds the other 7? Or it could be bad Ram that the rom's pump the stage information into? Like one or two Ram chips hold 7 of the stages and one or two other roms hold the other 7? Its the next route to check really.
I have noticed that one of the Mask Rom sockets is wonkily soldered in so Im going to replace that to see if it helps at all.
Another issue the game had, which was a very minor one, was that player one had no heavy punch. Player 2 was fine. So I started looking around the edge connector and tracing back from the player one A button connector into the board. The trace seemed to come into a small bank of 3 LS245's not far from the edge, and one of them was socketed which makes me think its been repaired in the past. So I switched that socketed chip out for one of the LS245's I had but it didn't change anything. So I re-traced and then cut out and socketed the 3rd in the bank. Without the chip player two has no movement or punches. So I put a new chip in and he worked again. Well, there's only one chip left in that bank, number 2. So I snipped him out and player one had no movement or punches. Popped a new socket in there and new chip and BINGO! Player one has all his punches now! A small victory!! The first bit of game repair I've done, albeit a very minor one. It's a good sign though that I might be able to get to the bottom of the graphical issue.
I also made up a quick CPS1 kick harness from an old sega megadrive pad's connector and an old header connector from a digital tv box I salvaged for parts. Worked first time which I was rather surprised at haha and all kicks work on both players! :D

So the next steps for this repair is to start using my Logic Probe a little more and get to grips with using it and understanding how it works. The datasheets for TTL chips on these boards are COMPLICATED!!! haha. But Im sure I can learn how to read them.
Im going to keep 'shotgunning' the board and see how I go. Its all experience in messing around in this hobby anyway. And its interesting seeing what happens when you take a chip away and see what's changed. :-)
Right, this was just a quick update really as it's been a while because I've had my head down. I'll try to get a load of photos of my new Supergun and make a post on that as Im really really pleased and proud of how its turned out. It's a 100% nicer than my first Supergun.
Anyway, catch you later
Porl''
Sorry there's been a bit of a delay between posts on here. I've been meaning to make a post on the new Jamma Supergun I made last month but I've gotten caught up playing it haha, going to Revival and since then trying to get the nerve up to start trying to repair the Street Fighter 2 Champion Edition bootleg I got from there.
Basically I've had crap luck with bootleg boards so far and I now see why peeps in the forum I frequent steer clear of them really. The two I've had now have had weird problems where all the proper original games I have had no problems at all. Oh well.
I was really excited to get this game back from Revival and then during the next week spend an evening playing it to death with my mate Glynn. See if I could win a few matches against his 4/5 hit dragon punch combo's :-P
Well I get home and had about half an hour to check it before going out again. So I ran upstairs and excitedly hooked my Supergun up and fired the sucker up. Well, it runs but man is it dissappointing! The graphics are all glitched out!! Ryu's sprite is flickering around constantly on the screen and the KO sign keeps moving about. It run's but it looks poop!
I decided to make a video of it the next day and put it on Youtube and the forum I go on to see if anyone on there could point me in the right direction to diagnose the problem.
Here's the vid of the board in action.
Two comments I got on the video were to check the voltage on my internal power supply. I had the +5v set to run my CPS2 boards which is a little higher than normal, I think +5.2v. So I got my mini screwdriver out and started to slowly crank the +5v to see what happens.
Well when you get the voltage nearly up to +6v the sprite glitchiness starts to go, well Ryu's sprite goes anyway. That's good to know that it will get rid of the sprite glitch kind of but I really shouldn't have to crank the voltage up to that high. And it still hasn't fixed the problem really.
The next problem I noticed was on certain stages the screen seems to bounce about, like its losing sync. Its not rolling, just moving about up and down and slightly left and right. But if you go all the way over to the left on some of the 'bouncing' levels it stops moving and plays as it should. Very weird!!
I've started trying to play through the game and through the bouncing to see which stages are fine, some are, and which bounce. Its got me wondering if its one of the Mask Roms which holds the game information is slightly 'bad' or something. Maybe one of the Mask Roms holds 7 stages and another Rom holds the other 7? Or it could be bad Ram that the rom's pump the stage information into? Like one or two Ram chips hold 7 of the stages and one or two other roms hold the other 7? Its the next route to check really.
I have noticed that one of the Mask Rom sockets is wonkily soldered in so Im going to replace that to see if it helps at all.
Another issue the game had, which was a very minor one, was that player one had no heavy punch. Player 2 was fine. So I started looking around the edge connector and tracing back from the player one A button connector into the board. The trace seemed to come into a small bank of 3 LS245's not far from the edge, and one of them was socketed which makes me think its been repaired in the past. So I switched that socketed chip out for one of the LS245's I had but it didn't change anything. So I re-traced and then cut out and socketed the 3rd in the bank. Without the chip player two has no movement or punches. So I put a new chip in and he worked again. Well, there's only one chip left in that bank, number 2. So I snipped him out and player one had no movement or punches. Popped a new socket in there and new chip and BINGO! Player one has all his punches now! A small victory!! The first bit of game repair I've done, albeit a very minor one. It's a good sign though that I might be able to get to the bottom of the graphical issue.
I also made up a quick CPS1 kick harness from an old sega megadrive pad's connector and an old header connector from a digital tv box I salvaged for parts. Worked first time which I was rather surprised at haha and all kicks work on both players! :D

So the next steps for this repair is to start using my Logic Probe a little more and get to grips with using it and understanding how it works. The datasheets for TTL chips on these boards are COMPLICATED!!! haha. But Im sure I can learn how to read them.
Im going to keep 'shotgunning' the board and see how I go. Its all experience in messing around in this hobby anyway. And its interesting seeing what happens when you take a chip away and see what's changed. :-)
Right, this was just a quick update really as it's been a while because I've had my head down. I'll try to get a load of photos of my new Supergun and make a post on that as Im really really pleased and proud of how its turned out. It's a 100% nicer than my first Supergun.
Anyway, catch you later
Porl''
Thursday, 16 May 2013
REVIVAL 2013
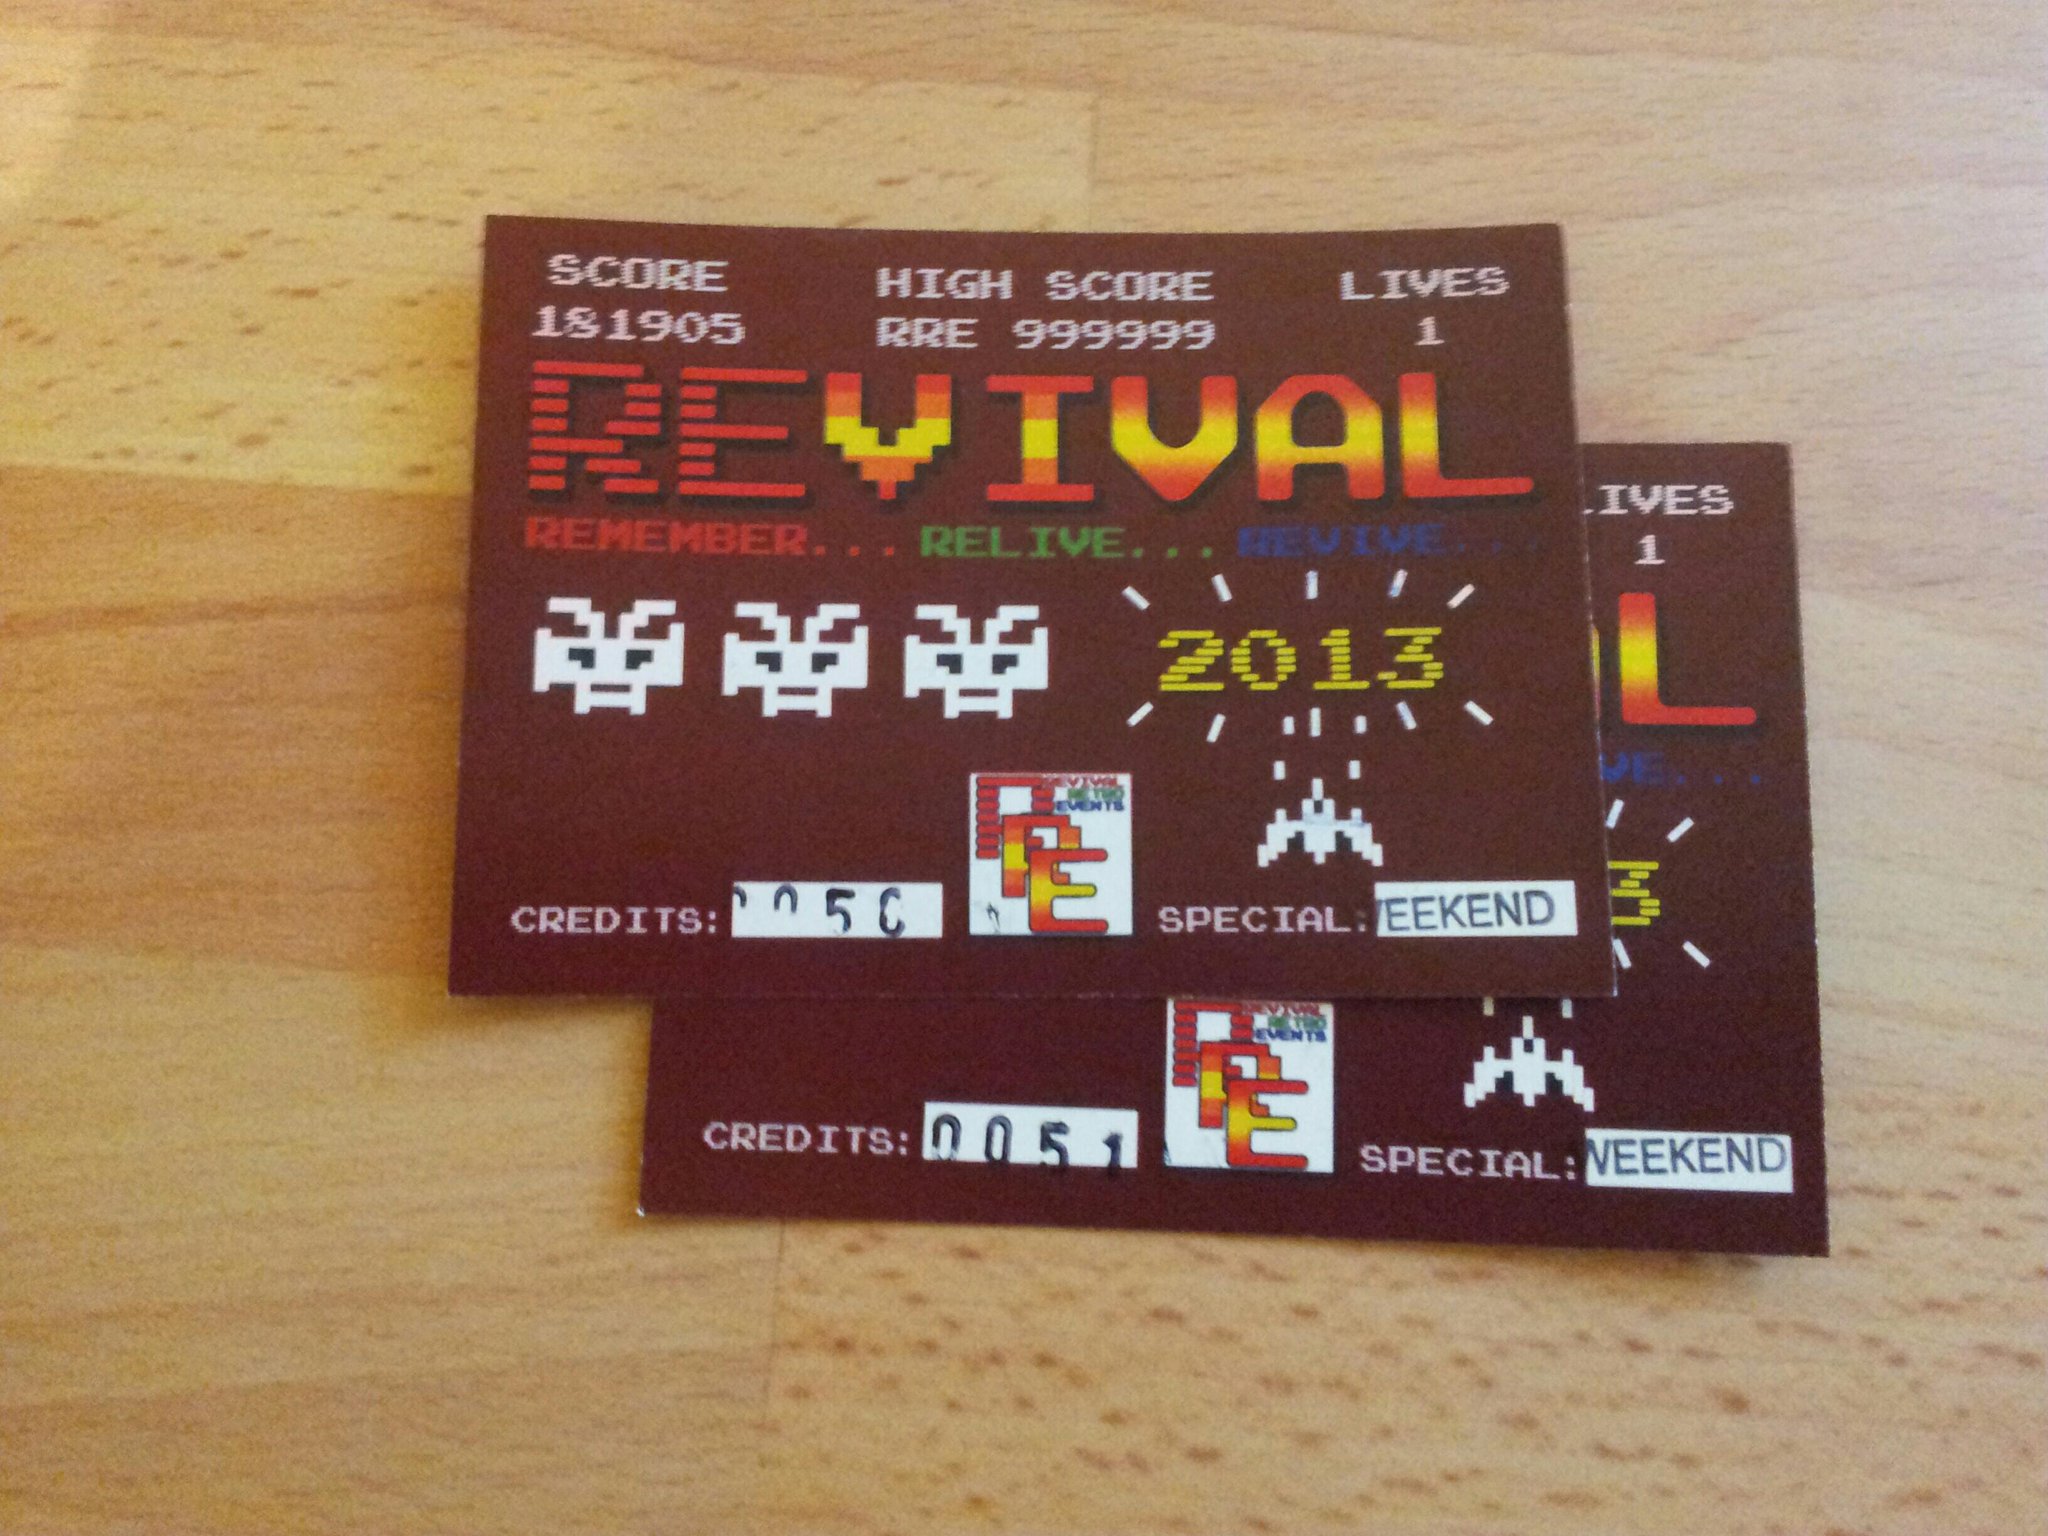
Hi all,
As you can see from the title of this post and the above image that Revival 2013 is happening this weekend in Wolverhampton. And you know what?......I CAN'T WAIT!! :-D
Me and my mate Glynn are heading over to this on the Saturday to geek out to the max and blast a load of arcade games!
I've been to some comic book conventions at the NEC and down in bristol but I've not been to a retro games event. Its going to be awesome to see all the old machines, have a go on some of the old arcade machines and games we played as kids and route through all the retro games and consoles for sale in the stalls.
Theres going to be tournaments and games competitions going all weekend along with programmers/game designers/games publishers doing talks all weekend too. We're going to be checking some of the talks out in between the game playing. Theres some really interesting speakers attending for the weekend such as The Oliver Twins, people from Ocean and Gremlin, Bob Wakelin (who I have a signed The New Zealand Story poster from) and loads of others.
I'm just super hyped about this weekend coming up and just wanted to post about it in case anyone who checks out my blog hasn't heard of this event and are close enough to attend.
Check out the event website here : http://www.revivalretroevents.com/
Porl''
Thursday, 9 May 2013
NOSTALGIA PUNCH! USING AN ORIGINAL COMPETITION PRO JOYSTICK ON PC WINUAE
Hi all,
Not too long a go I finally managed to get Winuae working on my PC laptop and started reliving my last few years at school with my ever faithful Amiga 500. Well, reliving it with just the games and not all the school work! haha.
I must admit that its a bit awkward to get the emulator up and running but after an afternoon I was happily playing some Dizzy - Prince of the Yolkfolk, Chaos Engine, Syndicate and Alien Breed. But, something was missing.... The games run as they did even if its in a small window because of the lower resolution of the old machine compared to my laptop screen, they even take as long to load. The thing that really knocked the experience on the head though was the lack of clicky competition pro joystick. The soft feel keyboard on my laptop just wasn't the same and neither was using my xbox 360 pad.
I did a bit of research on the internet and saw that you can get a USB to amiga adapter but they were surprisingly expensive and for me I'd much prefer to have a go myself and make something rather than drop a lot of cash on a pre-made thing. I found that some smart peep's had pad hacked a cheap usb gamepad and made an adapter for theirs in various guises, had a quick look at their descriptions and decided to make my own.
I got my hands on a cheap SNES replica usb game pad from amazon and a project box that should fit the PCB in nicely along with a spare megadrive 2 pad socket left over from a broken megadrive.

With all the parts collected together I set about wiring up the d-sub 9 socket from the megadrive 2 to the PCB of the usb SNES pad using a pinout for the Amiga joystick so I knew what wire went where. This should be a really nice and quick little project as its essentially doing a little wiring and bingo your done. Well, I ran into a hurdle and one that I couldn't seem to get over. The SNES pad has 2 sets of grounds. One common ground that runs around the pad which hits all the pad buttons which is awesome, this is exactly what you want. Except this pad had a weird ground that ran through left and right and up and down seperately. They have what I found to be called a "secret ground" which I couldn't find on the pad. This resulted in the fire button working fine on the joystick but you could only move left and down. You pressed right, you went left and up made you go down. That just wasn't working out at all.
So just a heads up, do not buy the cheap SNES usb pad from Amazon if you want to pad hack it for this kind of thing. It works great for the SNES emulators but not the hacking. I must admit I was a little disappointed but every pad is designed differently.
The next day we had to nip to Curry's to pick up a memory card for my girlfriends mom so I nosed through their usb gamepads and came across the Saitek p380 going cheap and thought I'd take a punt on that in a hope it would have a common ground to it. My quick searches before we went said that at least 2 different models of Saitek had common ground so I had my fingers crossed. Its a dual shock pad which is complete overkill button and d-pad wise but thankfully when I cracked it open it had common ground on all buttons!!
5 minutes later and I have a working joystick adapter. Thing to remember, get a pad with common ground on all buttons and you are laughing!! :-D

A thing to note as well is that I soldered directly to where the ribbon connectors join the button board to the smaller board that does all the clever bits. I would normally have soldered to each input side of the buttons on the PCB but thought I would try it this way and was pleasently surprised that it works great like this and its a lot less fiddly compared to tinning the small pads of the PCB.
As you can see from the above photo I have the joystick adapter up and running on Winuae on my laptop but the pad PCB wont fit into the project case! Doh! I'd measured it up for the other pad which only just fit in but the Saitek is about a centimeter wider so some cutting was going to be needed. I've not cut a pad PCB before so I wasn't sure if it would work or not so I tested it by cutting the PCB down on the right hand side (button side) as I only need button 1 for the joystick to use.
I scored the PCB with my stanley knife and a metal ruler all the way round and snapped it as cleanly as I could with my pliers and Bingo! The Pad still works! It seems that if you wire to the ribbon cable solder points you can cut the pad down nicely.

The PCB still wouldn't fit in the case so I did the same on the left hand D-button side of the PCB and again checked it still worked.
Now it was fitting inside the project box nicely I had to desolder the usb wire from the pad so I could feed the wire through the hole I'd drilled into the box. This pad has a nice moulded bit on the wire which butts up to the bottom of the pad which I wanted to keep to add a bit of a manufactured look to the adapter. The only way I could keep this though was to extend the four usb wires so there would be enough slack inside the case to move the moulded piece far enough out that it could be attached to the case. With it wired up I hot glued the usb wire to the inside of the hole while pushing the moulded piece up to the side of the box so it would fit flush.
The next step for me was wanting to keep the LED thats on the pad usable. I wanted it to be on the project box so that when you plugged it into the usb port it turned on and you knew it was all up and running. The LED on the pad is quite short so I snipped the LED off the pad, wired up some extensions to it and hot glued it into the box.

Finished! All the wiring and extensions are done so its time to squeeze the pad and wiring back into the case and make sure it all shuts nicely. Its pretty snug in there but there isn't much wasted space and the pad shouldn't move about much at all inside the case.

Looking inside the case it looks quite complicated but its really not. Its quite straight forward really and I just made it a little extra work by extending the wiring to get it to look how I wanted it to look. If you wanted to do it really quickly you would really only need to desolder 4 wires (the usb cable) and solder up 6 wires from the pad to the joystick socket and your done. :-)
So here are a few photos of the finished unit all hooked up and being used.


It's turned out really great I think and looks the bees knees with the green LED on the top. Also it's accomplished its mission and playing Winuae with the competition pro or zip stick I have really makes the games feel 100% more authentic! Im really hyped up now to play more Winuae on my laptop now and get some of the games I used to love on my old Amiga 500.
So if your up for the little bit of work and want to use your original joysticks on the PC then give this a go. It is a nice quick project and very satisfying to be able to play these old games using the old hardware via something you've made up yourself. :-)
Catch you later
Porl''
Not too long a go I finally managed to get Winuae working on my PC laptop and started reliving my last few years at school with my ever faithful Amiga 500. Well, reliving it with just the games and not all the school work! haha.
I must admit that its a bit awkward to get the emulator up and running but after an afternoon I was happily playing some Dizzy - Prince of the Yolkfolk, Chaos Engine, Syndicate and Alien Breed. But, something was missing.... The games run as they did even if its in a small window because of the lower resolution of the old machine compared to my laptop screen, they even take as long to load. The thing that really knocked the experience on the head though was the lack of clicky competition pro joystick. The soft feel keyboard on my laptop just wasn't the same and neither was using my xbox 360 pad.
I did a bit of research on the internet and saw that you can get a USB to amiga adapter but they were surprisingly expensive and for me I'd much prefer to have a go myself and make something rather than drop a lot of cash on a pre-made thing. I found that some smart peep's had pad hacked a cheap usb gamepad and made an adapter for theirs in various guises, had a quick look at their descriptions and decided to make my own.
I got my hands on a cheap SNES replica usb game pad from amazon and a project box that should fit the PCB in nicely along with a spare megadrive 2 pad socket left over from a broken megadrive.

With all the parts collected together I set about wiring up the d-sub 9 socket from the megadrive 2 to the PCB of the usb SNES pad using a pinout for the Amiga joystick so I knew what wire went where. This should be a really nice and quick little project as its essentially doing a little wiring and bingo your done. Well, I ran into a hurdle and one that I couldn't seem to get over. The SNES pad has 2 sets of grounds. One common ground that runs around the pad which hits all the pad buttons which is awesome, this is exactly what you want. Except this pad had a weird ground that ran through left and right and up and down seperately. They have what I found to be called a "secret ground" which I couldn't find on the pad. This resulted in the fire button working fine on the joystick but you could only move left and down. You pressed right, you went left and up made you go down. That just wasn't working out at all.
So just a heads up, do not buy the cheap SNES usb pad from Amazon if you want to pad hack it for this kind of thing. It works great for the SNES emulators but not the hacking. I must admit I was a little disappointed but every pad is designed differently.
The next day we had to nip to Curry's to pick up a memory card for my girlfriends mom so I nosed through their usb gamepads and came across the Saitek p380 going cheap and thought I'd take a punt on that in a hope it would have a common ground to it. My quick searches before we went said that at least 2 different models of Saitek had common ground so I had my fingers crossed. Its a dual shock pad which is complete overkill button and d-pad wise but thankfully when I cracked it open it had common ground on all buttons!!
5 minutes later and I have a working joystick adapter. Thing to remember, get a pad with common ground on all buttons and you are laughing!! :-D

A thing to note as well is that I soldered directly to where the ribbon connectors join the button board to the smaller board that does all the clever bits. I would normally have soldered to each input side of the buttons on the PCB but thought I would try it this way and was pleasently surprised that it works great like this and its a lot less fiddly compared to tinning the small pads of the PCB.
As you can see from the above photo I have the joystick adapter up and running on Winuae on my laptop but the pad PCB wont fit into the project case! Doh! I'd measured it up for the other pad which only just fit in but the Saitek is about a centimeter wider so some cutting was going to be needed. I've not cut a pad PCB before so I wasn't sure if it would work or not so I tested it by cutting the PCB down on the right hand side (button side) as I only need button 1 for the joystick to use.
I scored the PCB with my stanley knife and a metal ruler all the way round and snapped it as cleanly as I could with my pliers and Bingo! The Pad still works! It seems that if you wire to the ribbon cable solder points you can cut the pad down nicely.

The PCB still wouldn't fit in the case so I did the same on the left hand D-button side of the PCB and again checked it still worked.
Now it was fitting inside the project box nicely I had to desolder the usb wire from the pad so I could feed the wire through the hole I'd drilled into the box. This pad has a nice moulded bit on the wire which butts up to the bottom of the pad which I wanted to keep to add a bit of a manufactured look to the adapter. The only way I could keep this though was to extend the four usb wires so there would be enough slack inside the case to move the moulded piece far enough out that it could be attached to the case. With it wired up I hot glued the usb wire to the inside of the hole while pushing the moulded piece up to the side of the box so it would fit flush.
The next step for me was wanting to keep the LED thats on the pad usable. I wanted it to be on the project box so that when you plugged it into the usb port it turned on and you knew it was all up and running. The LED on the pad is quite short so I snipped the LED off the pad, wired up some extensions to it and hot glued it into the box.

Finished! All the wiring and extensions are done so its time to squeeze the pad and wiring back into the case and make sure it all shuts nicely. Its pretty snug in there but there isn't much wasted space and the pad shouldn't move about much at all inside the case.

So here are a few photos of the finished unit all hooked up and being used.


So if your up for the little bit of work and want to use your original joysticks on the PC then give this a go. It is a nice quick project and very satisfying to be able to play these old games using the old hardware via something you've made up yourself. :-)
Catch you later
Porl''
Subscribe to:
Posts (Atom)